Are you experiencing engine performance issues, strange noises, or even stalling while driving? If so, it might be time to check your camshaft position sensor! This small but mighty component plays a crucial role in monitoring the position of your engine’s camshaft, and if it starts to fail, it can lead to various problems. In this article, we will explore the common symptoms of a failing camshaft position sensor and guide you through the process of replacing it, ensuring that you can get your vehicle back on the road in no time.
Symptoms of a Failing Camshaft Position Sensor
The camshaft position sensor is a crucial component in your vehicle’s engine system. It is responsible for monitoring the position and speed of the camshaft, which controls the opening and closing of the engine’s valves. When this sensor starts to fail, it can cause various issues with the performance of your vehicle. Here are the most common symptoms of a failing camshaft position sensor:
1. Loss of Power
One of the first signs you may notice when your camshaft position sensor is failing is a significant loss of power. Your engine may struggle to accelerate, and you may experience a noticeable decrease in overall performance. This loss of power can make it difficult to merge onto highways or overtake other vehicles, making your driving experience less enjoyable.
2. Difficulty Starting
A failing camshaft position sensor can also lead to difficulty starting your vehicle. You may find that the engine takes longer to crank over or that it fails to start altogether. This can be frustrating and inconvenient, especially when you’re in a rush to get somewhere. If you notice prolonged cranking or multiple attempts to start the engine, it may be time to check the camshaft position sensor.
3. Stalling or Stuttering Engine
A failing camshaft position sensor can cause your engine to stall or stutter during operation. This can happen while idling, accelerating, or even at a constant speed. The engine may momentarily cut out and then resume, causing a jerking sensation. If you experience these symptoms, it’s essential to address the issue promptly to avoid potential safety hazards on the road.
4. Rough Idling
When the camshaft position sensor is malfunctioning, you may notice rough idling. The engine may sound uneven or shaky when you’re at a standstill, such as when waiting at a traffic light or in a drive-thru. This rough idling can be a sign that the sensor is not providing accurate readings to the engine’s control module, affecting the fuel-air mixture and overall engine performance.
5. Engine Misfires
Another symptom of a failing camshaft position sensor is engine misfires. Misfires occur when the fuel-air mixture is not ignited at the right time or not ignited at all. This can lead to a rough running engine, loss of power, and even potential damage to the internal components of the engine. If you experience frequent misfires, it’s crucial to have your camshaft position sensor checked and replaced if necessary.
6. Poor Fuel Efficiency
A failing camshaft position sensor can also impact your vehicle’s fuel efficiency. When the sensor provides inaccurate data to the engine control module, it can cause incorrect fuel injection timing and duration. This can result in excessive fuel consumption, leading to decreased mileage per gallon. If you notice a sudden decrease in your vehicle’s fuel efficiency, it’s worth considering the possibility of a failing camshaft position sensor.
7. Check Engine Light
The check engine light is a useful indicator that something may be wrong with your vehicle. In the case of a failing camshaft position sensor, it can trigger the check engine light to illuminate on your dashboard. While the check engine light can indicate various issues, it’s essential to have it scanned for trouble codes to pinpoint the exact problem. If the code indicates a camshaft position sensor issue, it’s time to consider a replacement.
8. Uneven Acceleration
A failing camshaft position sensor can cause uneven or erratic acceleration. You may feel a hesitation or delay in power delivery when you press the accelerator pedal, especially during initial acceleration from a complete stop. This lack of smoothness in acceleration can make your driving experience uncomfortable and potentially unsafe, as it affects your ability to control the vehicle effectively.
9. Backfiring
Backfiring can occur when the air-fuel mixture in the engine’s cylinders ignites at the wrong time. A failing camshaft position sensor can disrupt the timing of the combustion process, leading to backfiring. This can produce loud popping or banging noises from the exhaust system. If you notice any unusual sounds coming from your vehicle’s exhaust, it’s essential to have the camshaft position sensor checked.
10. Excessive Exhaust Emissions
Lastly, a failing camshaft position sensor can contribute to increased exhaust emissions. When the sensor fails to provide accurate readings to the engine’s control module, it can lead to improper fuel combustion. This can result in excessive levels of harmful emissions, such as hydrocarbons (HC) and nitrogen oxides (NOx). If you notice an increase in exhaust smoke or fail an emissions test, it’s worth investigating the condition of your camshaft position sensor.
Replacing the Camshaft Position Sensor
If you’re experiencing any of the symptoms mentioned above and suspect a failing camshaft position sensor, it’s essential to take prompt action. While replacing the sensor may require some mechanical knowledge and basic tools, it is often a straightforward process that you can tackle yourself. Here’s a step-by-step guide on how to replace the camshaft position sensor:
1. Prepare the vehicle
Ensure that your vehicle is parked on a flat surface and engage the parking brake. It’s also advisable to disconnect the negative terminal of the battery to prevent any accidental electrical mishaps. Gather the necessary tools, including a wrench or socket set, electrical connectors, and a new camshaft position sensor that matches your vehicle’s specifications.
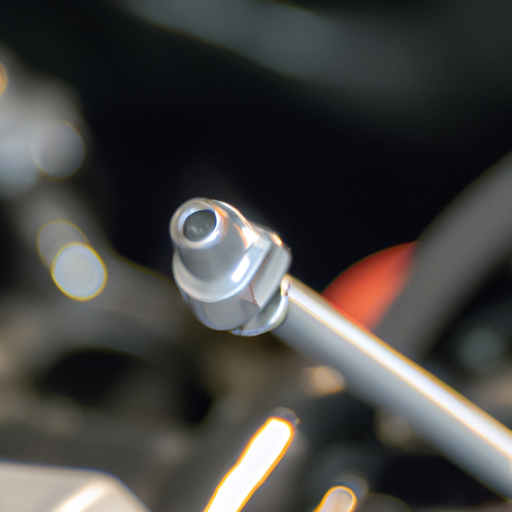
2. Locate the sensor
Refer to your vehicle’s owner’s manual or repair guide to determine the exact location of the camshaft position sensor in your engine. In most cases, it is located near the camshaft itself, often on the cylinder head or timing cover. Carefully inspect the area and identify any components that need to be removed to access the sensor.
3. Disconnect the battery
Before starting any work, disconnect the battery by removing the negative (black) cable from the battery terminal. This step eliminates any risk of electrical shock or damage to sensitive electronic components while working on the sensor.
4. Remove necessary components
Depending on the specific location of the sensor, you may need to remove other components to gain access to it. This could include air intake ducts, engine covers, or other engine components. Take your time and ensure that you keep track of any bolts, screws, or clips that need to be removed, as you will need to reassemble everything correctly later on.
5. Remove the old sensor
Once you have clear access to the camshaft position sensor, locate the electrical connector attaching it to the wiring harness. Carefully unplug the connector by pressing down on any release tabs or clips. Then, use a wrench or socket set to remove the sensor itself, which is typically secured with a few bolts. Take note of the sensor’s orientation and position for proper installation of the new one.
6. Install the new sensor
Take your new camshaft position sensor and compare it to the old one to ensure it is the correct replacement. Carefully position the sensor in the same location and orientation as the old one and secure it with the bolts. Reconnect the electrical connector, ensuring it clicks into place securely. Double-check that the sensor is firmly installed and properly aligned.
7. Reassemble the components
With the new sensor in place, it’s time to reassemble any components that were removed earlier. Follow the reverse order of removal, carefully aligning and tightening all bolts, screws, and clips. Ensure that all connectors and hoses are properly reconnected and secure.
8. Reconnect the battery
Once you have completed reassembling the necessary components, it’s time to reconnect the battery. Start by connecting the negative (black) cable to the battery terminal and tighten it securely. Make sure the connection is firm and that there are no loose or exposed wires.
9. Test the sensor
With the new camshaft position sensor installed, it’s vital to test its functionality before assuming the replacement was successful. Start your vehicle and observe for any abnormal symptoms, such as those mentioned earlier. Take a short test drive to assess the engine’s performance and check for any error codes or warning lights on the dashboard. If everything appears to be in order, you can proceed to the final step.
10. Clear any error codes
If your vehicle’s computer stored any error codes related to the failing camshaft position sensor, it’s necessary to clear them from the system. This can be done using an OBD-II scanner or by disconnecting the battery for a short period. Clearing the error codes ensures that any previous issues are not falsely flagged and allows your vehicle to operate optimally.
By following these step-by-step instructions, you can replace your camshaft position sensor and potentially restore your vehicle’s performance and reliability. However, if you’re uncomfortable performing these tasks yourself, or if the symptoms persist after replacement, it’s always best to consult a professional mechanic for further diagnosis and assistance.


