If you find yourself shivering in your car despite cranking up the heat, it’s likely that there’s an issue with your car’s heater control valve. This small but vital component is responsible for regulating the flow of hot coolant to your car’s heater core, ensuring that warm air is circulated throughout the cabin. But how can you tell if the heater control valve is the culprit behind your icy discomfort? And if it is, what can you do to fix it? In this article, we will explore the signs of a malfunctioning heater control valve and provide you with some practical solutions to get your car’s heat back on track.
Understanding the Car’s Heater Control Valve
What is a heater control valve?
A heater control valve is a crucial component of a car’s heating system. It acts as a gatekeeper, controlling the flow of hot coolant from the engine to the heater core. By regulating the amount of hot coolant circulating in the heater core, the valve determines the amount of heat that is transferred into the cabin of the car. This allows you to adjust the temperature inside the car according to your comfort.
The role of the heater control valve in the car’s heating system
The heater control valve plays a vital role in the car’s heating system by regulating the flow of hot coolant. When you adjust the temperature control knob or slider inside the car, it controls the opening and closing of the heater control valve. If you want hot air to blow into the cabin, the valve opens, allowing hot coolant to flow through the heater core. On the other hand, if you want cool air, the valve closes, restricting the flow of hot coolant. This simple mechanism ensures that you can control the temperature inside the car as desired.
Symptoms of a Faulty Heater Control Valve
A faulty heater control valve can lead to various symptoms that indicate its malfunction. It is important to recognize these symptoms in order to diagnose and address the issue promptly.
No heat in the cabin
One of the most noticeable symptoms of a faulty heater control valve is the absence of heat in the cabin, even when you have the temperature control set to maximum. This means that the valve is not allowing hot coolant to flow through the heater core, resulting in cold air blowing into the car.
Inconsistent heating
Another common symptom of a faulty heater control valve is inconsistent heating. You may experience hot air blowing into the cabin at times and then it suddenly turns cold. This inconsistency in the temperature indicates that the valve is not functioning properly and is not maintaining a steady flow of hot coolant.
Leaking coolant
A leaking coolant is another telltale sign of a faulty heater control valve. If you notice puddles of coolant underneath your car or if you smell a sweet scent inside the cabin, there is a high chance that the valve is leaking coolant. It is important to address this issue promptly, as coolant leakage can lead to engine damage if left unattended.
Overheating engine
A faulty heater control valve can also cause the engine to overheat. When the valve is not functioning correctly and restricts the flow of coolant, it can lead to an inadequate cooling system. This can result in the engine temperature rising to unsafe levels, potentially causing irreversible damage to the engine if not addressed promptly.
Diagnostic Process for a Faulty Heater Control Valve
If you suspect that your car’s heater control valve is faulty, there are several diagnostic steps you can take to confirm the issue.
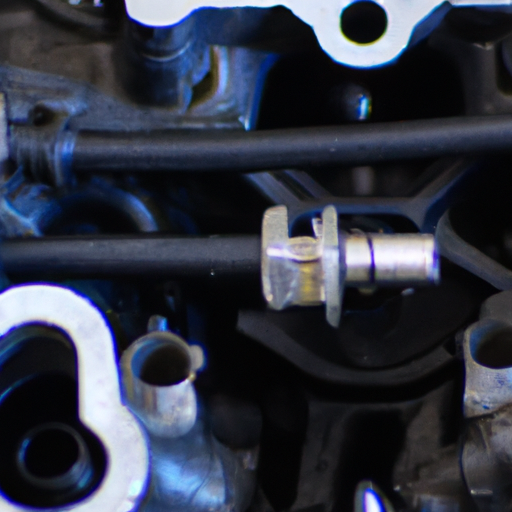
Checking the heater control valve visually
To visually inspect the heater control valve, start by locating it in the engine bay. The valve is typically connected to the heater hoses and may have a lever or knob for manual control. Inspect for any signs of damage, such as cracks, leaks, or loose connections. If you notice any abnormalities, it is a strong indication of a faulty valve.
Testing the heater control valve with a multimeter
Using a multimeter, you can test the electrical continuity of the heater control valve. Start by disconnecting the electrical connector from the valve. Set the multimeter to the resistance mode and touch the probes to the two terminals on the valve. A reading of infinite resistance indicates a faulty valve, while a reading of low resistance signifies proper electrical continuity.
Inspecting coolant flow through the valve
To inspect coolant flow through the valve, you need to observe it while the engine is running at operating temperature. Carefully touch the heater hoses connected to the valve to check if they are hot. If one hose is significantly hotter than the other, it indicates a restricted flow of coolant through the valve, confirming a faulty valve.
Addressing Issues with a Faulty Heater Control Valve
Once you have diagnosed a faulty heater control valve, it is important to address the issue promptly to restore the proper functioning of the car’s heating system.
Replacing the heater control valve
If the heater control valve is severely damaged or beyond repair, it may be necessary to replace it. To do this, gather the necessary tools and materials, such as screwdrivers, socket set, coolant vacuum kit, and a replacement heater control valve. Follow a step-by-step guide to remove the old valve, install the new one, refill the coolant, and test the heating system.
Repairing the heater control valve
In some cases, the heater control valve may have minor issues that can be repaired. This approach is more cost-effective and can be done if the valve is not severely damaged. To repair the valve, gather the necessary tools and materials, such as screwdrivers, socket set, and replacement components if needed. Follow a step-by-step guide to disassemble the valve, identify the issue, repair the components, reassemble the valve, reinstall it, and test the heating system.
Tools and Materials Needed
To diagnose and address issues with a faulty heater control valve, you will need several tools and materials. These include:
- Screwdrivers: Different types and sizes to remove screws and fasteners.
- Socket set: A set of sockets and ratchets for removing bigger bolts or nuts.
- Multimeter: Used to test electrical continuity and resistance.
- Coolant vacuum kit: Helps to drain and refill the coolant system efficiently.
- Replacement heater control valve: Make sure to purchase the correct valve that matches the specifications of your car’s make and model.
Step-by-Step Guide: Diagnostic Process
To diagnose a faulty heater control valve, follow these step-by-step instructions:
Step 1: Park the vehicle and let the engine cool down
Ensure the car is parked in a safe location and allow the engine to cool down completely before proceeding with any diagnostic steps.
Step 2: Locate the heater control valve
Consult your car’s manual or online resources to locate the heater control valve in the engine bay. It is generally connected to the heater hoses and may have a lever or knob for manual control.
Step 3: Visual inspection
Carefully inspect the heater control valve for any visible signs of damage, such as cracks, leaks, or loose connections. Take note of any abnormalities that may indicate a faulty valve.
Step 4: Testing with a multimeter
Disconnect the electrical connector from the heater control valve and set the multimeter to the resistance mode. Touch the probes to the two terminals on the valve and observe the reading. A high resistance reading indicates a faulty valve.
Step 5: Inspecting coolant flow through the valve
Start the engine and let it run until it reaches operating temperature. Carefully touch the heater hoses connected to the valve to check their temperature. If one hose is significantly hotter than the other, it suggests a restricted flow of coolant through the valve, indicating a faulty valve.
Step-by-Step Guide: Replacing the Heater Control Valve
If the diagnostic process confirms a faulty heater control valve that cannot be repaired, follow these step-by-step instructions to replace it:
Step 1: Gather the necessary tools and materials
Collect all the required tools and materials, including screwdrivers, socket set, a coolant vacuum kit, and a replacement heater control valve that matches your car’s make and model.
Step 2: Park the vehicle and let the engine cool down
Ensure the car is parked in a safe location and allow the engine to cool down completely before proceeding with the replacement process.
Step 3: Locate the heater control valve
Refer to your car’s manual or online resources to locate the heater control valve in the engine bay. Take note of its position and the connections to the heater hoses.
Step 4: Drain the coolant
Using a coolant vacuum kit, drain the coolant from the system to avoid any spills or contamination during the replacement process. Follow the manufacturer’s instructions for the proper procedure.
Step 5: Remove the old heater control valve
Using the appropriate tools, carefully remove the bolts or fasteners that secure the old heater control valve in place. Take note of the connections and hoses attached to the valve.
Step 6: Install the replacement heater control valve
Position the replacement heater control valve in place and secure it using the appropriate bolts or fasteners. Reconnect the hoses and ensure all connections are tight and secure.
Step 7: Refill the coolant
Follow the manufacturer’s instructions on how to refill the coolant system. Use the coolant vacuum kit to add the correct amount of coolant and ensure there are no air pockets in the system.
Step 8: Test the heating system
Start the engine and test the heating system to ensure the replacement heater control valve is functioning properly. Check for the presence of heat in the cabin and observe the temperature control knob/slider to adjust the temperature as desired.
Step-by-Step Guide: Repairing the Heater Control Valve
If you choose to repair the faulty heater control valve instead of replacing it, follow these step-by-step instructions:
Step 1: Gather the necessary tools and materials
Collect all the required tools and materials, including screwdrivers and a socket set. Additionally, gather any replacement components that may be needed for the repair.
Step 2: Park the vehicle and let the engine cool down
Ensure the car is parked in a safe location and allow the engine to cool down completely before proceeding with the repair process.
Step 3: Locate the heater control valve
Refer to your car’s manual or online resources to locate the heater control valve in the engine bay. Take note of its position and the connections to the heater hoses.
Step 4: Remove the heater control valve
Using the appropriate tools, carefully remove the bolts or fasteners that secure the heater control valve in place. Take note of the connections and hoses attached to the valve.
Step 5: Disassemble the valve and identify the issue
Carefully disassemble the heater control valve, paying attention to the components and their arrangement. Identify the specific issue that is causing the valve to malfunction, such as a broken lever or a damaged seal.
Step 6: Repair the valve components
Based on the identified issue, proceed with the necessary repairs. This may involve replacing broken components, fixing damaged seals, or repairing any other defects. Take your time and ensure that the repairs are done accurately.
Step 7: Reassemble the valve
Once the necessary repairs are completed, reassemble the heater control valve, making sure all components are in their correct positions. Follow the reverse order of disassembly to ensure everything is properly aligned.
Step 8: Reinstall the repaired valve
Carefully reinstall the repaired heater control valve, securing it in place with the appropriate bolts or fasteners. Reconnect the hoses and ensure all connections are tight and secure.
Step 9: Test the heating system
Start the engine and test the heating system to ensure the repaired heater control valve is functioning properly. Check for the presence of heat in the cabin and observe the temperature control knob/slider to adjust the temperature as desired.
Common Mistakes to Avoid
While diagnosing and addressing issues with a car’s heater control valve, it is important to avoid the following common mistakes:
Neglecting to properly cool down the engine
Before starting any diagnostic or repair procedures, ensure that the engine is completely cooled down. Working on a hot engine can lead to burns and other safety hazards.
Skipping the visual inspection
A visual inspection of the heater control valve is crucial to identify any visible signs of damage or leaks. Skipping this step may result in overlooking important issues that can lead to further complications.
Not testing the valve with a multimeter
Testing the electrical continuity and resistance of the heater control valve with a multimeter can provide valuable information about its functionality. Neglecting this step may result in inaccurate diagnoses or repairs.
Failing to drain the coolant before valve replacement
When replacing the heater control valve, it is important to drain the coolant system properly to avoid spills or contamination. Failing to do so can lead to fluid loss and potential damage to the engine.
Inaccurate identification of the valve issue
Properly identifying the specific issue with the heater control valve is essential to carry out the correct repairs. Misdiagnosing the issue can result in unnecessary repairs or replacements, leading to wasted time and money.
Conclusion
Understanding the car’s heater control valve is essential for diagnosing and addressing any issues that may arise. By recognizing the symptoms of a faulty valve and following the diagnostic process, you can successfully identify the problem and choose the appropriate solution, whether it be replacing or repairing the valve. By following the step-by-step guides and avoiding common mistakes, you can resolve issues with your car’s heater control valve and ensure a comfortable and functional heating system for your vehicle.


