Have you ever had trouble with the interior lighting system in your car? Whether it’s a dimly lit cabin or a complete lack of lights, it can be frustrating and inconvenient. In this article, we’ll walk you through the steps of diagnosing and fixing problems with your car’s interior lighting system. From checking the fuse to replacing bulbs, we’ll provide you with simple solutions to ensure you always have a well-lit and comfortable driving experience.
Diagnosing Problems
Checking the fuse
When you’re facing issues with your car’s interior lighting system, the first step in diagnosing the problem is to check the fuse. The fuse is responsible for protecting the circuit from any electrical faults. Start by locating the fuse box, which is usually located under the dashboard or in the engine compartment. Check the diagram on the fuse box cover to identify the fuse associated with the interior lighting system. Carefully remove the fuse and inspect it for any signs of damage or a blown filament. If the fuse appears to be faulty, replace it with a new one of the same rating.
Testing the switch
If the fuse is not the culprit, the next step is to test the switch. The interior lights in your car are controlled by a switch, which is usually located on the dashboard or the door frame. Start by checking if the switch is firmly in the “On” position. If it is, try toggling the switch several times to see if that resolves the issue. Sometimes, the switch may become faulty due to wear and tear or a loose connection. In such cases, it may need to be repaired or replaced.
Inspecting the wiring
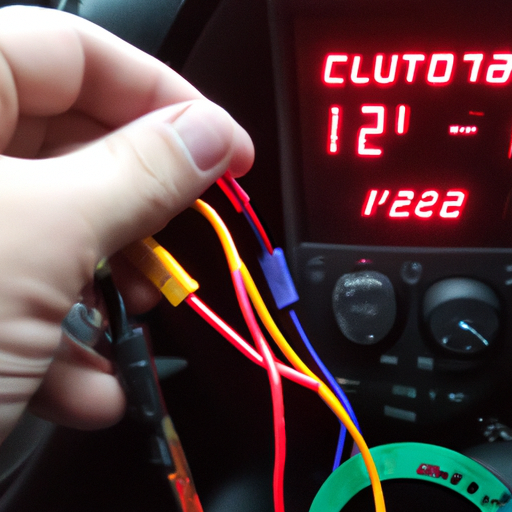
If the fuse and the switch are both functioning properly, the next step is to inspect the wiring. Wiring issues can occur due to frayed, damaged, or loose connections. Carefully examine the wiring associated with the interior lighting system, which may be located behind the dashboard or along the door frame. Look for any signs of physical damage or loose connections. If you spot any issues, repair or replace the damaged wiring as necessary to restore proper functioning.
Examining the bulbs
If none of the above steps resolve the issue, it’s time to examine the bulbs themselves. Over time, interior light bulbs can burn out or become loose. Start by removing the bulb cover or lens and inspecting the bulb. If it appears to be loose, simply tighten it properly. If the bulb is burned out, replace it with a new one of the same size and type. It’s important to use the correct bulb specifications to ensure proper illumination and prevent any electrical issues.
Using a multimeter
In some cases, troubleshooting the interior lighting system may require the use of a multimeter. A multimeter is a versatile tool that can help you measure voltage, resistance, and continuity. If you’re comfortable using a multimeter, you can test the wiring and connections to identify any electrical faults. Follow the instructions provided with your multimeter and compare the readings to the manufacturer’s specifications to determine if there are any abnormalities.
Verifying the ground connection
Lastly, ensure that the ground connection for the interior lighting system is secure and properly connected. The ground connection acts as a pathway for the electrical current to return to the battery. If the ground connection is loose or has become corroded over time, it can cause issues with the interior lighting system. Locate the ground wire associated with the interior lighting system and ensure that it is tightly connected to a clean and secure grounding point. Cleaning any corrosion and applying dielectric grease can help improve the connection.
Fixing Problems
Replacing blown fuses
If you’ve identified a blown fuse as the cause of the issue, replacing it is a simple fix. Purchase a new fuse of the same rating from an auto parts store. Make sure the interior lighting system is turned off, then locate the fuse box and the corresponding fuse. Carefully remove the blown fuse and insert the new one in its place. Once the new fuse is securely in place, test the interior lighting system to ensure it is functioning properly.
Repairing or replacing the switch
If the switch is determined to be faulty, it may require repair or replacement. Repairing a switch can involve tightening loose connections or cleaning any debris affecting its functionality. However, if the switch is beyond repair, you will need to purchase a new one. Consult your car’s manual or seek guidance from a professional to determine the exact steps needed to replace the switch. Once the new switch is installed, test the interior lighting system to confirm that it is operating as expected.
Fixing damaged wiring
Damaged wiring can be a bit more challenging to fix, but it is essential for ensuring the proper functioning of the interior lighting system. If you notice frayed or damaged wires, carefully remove the affected section and strip the ends to expose the clean wire. Use electrical tape or wire connectors to splice in a new section of wire. Ensure that the connections are secure and insulated to prevent any electrical shorts. Once the wiring has been repaired, test the interior lighting system to make sure everything is working correctly.
Replacing faulty bulbs
If you’ve determined that a faulty bulb is the cause of the problem, replace it with a new one. Start by turning off the interior lighting system and locating the bulb that needs replacing. Gently remove the bulb cover or lens, and then unscrew or unclip the old bulb. Take note of the bulb’s size and type, and purchase a replacement that matches the specifications. Insert the new bulb and secure it in place before reattaching the bulb cover or lens. Finally, test the interior lighting system to verify that the new bulb is functioning properly.
Repairing or replacing the ground connection
In the case of a faulty ground connection, it may be necessary to repair or replace it. Start by locating the ground wire associated with the interior lighting system. Clean the connection point and the wire itself, removing any corrosion or debris. Apply dielectric grease to protect against future corrosion and ensure a solid connection. If the ground wire itself is damaged beyond repair, it will need to be replaced. Consult your car’s manual or seek assistance from a professional to correctly install a new ground wire. After repairing or replacing the ground connection, test the interior lighting system to confirm that it is working correctly.
Specific Issues and Solutions
Interior lights not working at all
If your car’s interior lights are not working at all, start by checking the fuse and ensuring that it is not blown. If the fuse is intact, proceed to test the switch and inspect the wiring. Check for loose connections or damage that may be causing the issue. If the issue persists, examine the bulbs and replace any that are burned out or loose. Verify the ground connection is secure and functioning properly. If none of these steps resolve the problem, it may require professional diagnosis and repair.
Interior lights flickering or dim
If your interior lights are flickering or dim, it may indicate a wiring issue or a faulty switch. Begin by inspecting the wiring for any loose or damaged connections. Repair or replace any affected wiring as necessary. Next, test the switch to ensure it is functioning properly. If the issue persists, it may be necessary to consult a professional for further diagnosis and repair.
Dome light not turning on when door opens
If your car’s dome light fails to turn on when the door opens, start by testing the switch associated with the dome light. Ensure that the switch is in the correct position and functioning properly. If the switch is fine, inspect the wiring connected to the dome light. Look for any loose connections or damage that may be interrupting the circuit. Repair or replace any faulty wiring accordingly. If the problem persists, it may require professional attention.
Map lights not functioning
If the map lights in your car are not functioning, begin by checking the fuse related to the map lights. Replace it if necessary. Next, examine the bulbs to ensure they are not burned out or loose. Replace any faulty bulbs with new ones. If the issue persists, inspect the wiring and connections associated with the map lights. Repair or replace any damaged wiring as needed. If the problem still persists, professional assistance may be required.
Trunk or glove box light not working
If the trunk or glove box light in your car fails to work, start by inspecting the corresponding fuse. Replace it if necessary. Next, check the switch associated with the trunk or glove box light. Ensure it is functioning properly and in the correct position. If the switch is fine, examine the wiring connected to the light. Repair or replace any damaged wiring as needed. Finally, test the light to confirm that it is now working correctly.
By following these steps and troubleshooting methods, you should be able to diagnose and fix common problems with your car’s interior lighting system. Remember to exercise caution when working with electrical components and consult a professional if you’re unsure or uncomfortable with any particular step. Happy troubleshooting and may your car’s interior lighting shine brightly once again!


