In this article, we will explore the process of diagnosing and repairing a leaking brake master cylinder. Whether you have noticed fluid dripping from your brakes or are experiencing a soft brake pedal, understanding the steps to identify and fix this issue can help ensure your safety on the road. By familiarizing yourself with the signs of a leaking brake master cylinder and learning the necessary repair techniques, you can confidently address this problem and keep your vehicle in optimal condition.
Diagnosing a Leaking Brake Master Cylinder
Identifying the symptoms
When it comes to diagnosing a leaking brake master cylinder, it’s important to be able to recognize the symptoms. One of the most noticeable symptoms is a soft or spongy brake pedal. If you find that your brake pedal goes all the way to the floor or feels mushy when you press on it, there may be a problem with the master cylinder. Another symptom to look out for is brake fluid pooling beneath your vehicle. If you notice a puddle of fluid under your car, it’s likely that you have a leak in the brake system. Additionally, low brake fluid levels, brake warning light illumination, and reduced braking performance can also indicate a problem with the master cylinder.
Checking brake fluid levels
To accurately diagnose a leaking brake master cylinder, it’s crucial to check the brake fluid levels. Start by locating the brake fluid reservoir, usually found on the driver’s side of the engine compartment. Remove the cap and visually inspect the fluid level. The reservoir should have a minimum and maximum mark. If the fluid is below the minimum mark, it’s a sign that there may be a leak in the system. In this case, adding brake fluid may temporarily solve the issue, but it’s essential to address the underlying problem.
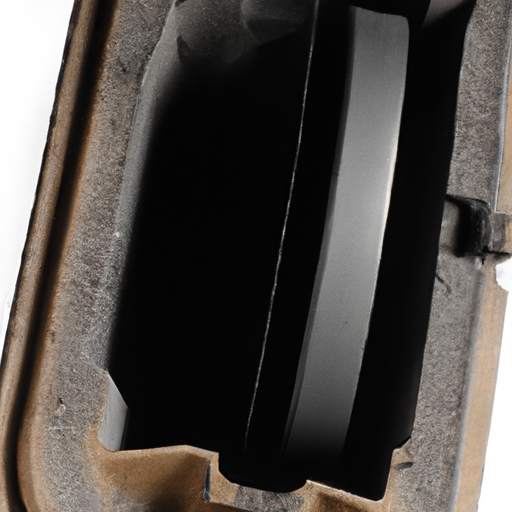
Inspecting for fluid leaks
Inspecting for fluid leaks is an essential step in diagnosing a leaking brake master cylinder. Start by visually examining the brake lines. Look for any signs of fluid accumulation or wet spots along the lines. Any visible leaks or dampness could be a sign of a leak in the system. Additionally, inspect the area around the master cylinder itself. Look for any signs of fluid accumulation or wetness at the base of the cylinder. Finally, don’t forget to check the brake booster for any signs of leaks. The brake booster is connected to the master cylinder and assists in the braking process. Any leaks in this component can indicate a problem with the master cylinder.
Testing the brake pedal
Testing the brake pedal is another crucial step in diagnosing a leaking brake master cylinder. Start by starting the engine to ensure proper hydraulic pressure in the brake system. With the engine running, apply and release the brake pedal multiple times. Pay close attention to any signs of abnormal pedal behavior. If the pedal feels soft, spongy, or if it sinks to the floor, there is likely an issue with the master cylinder. It’s important to address this issue promptly to ensure safe braking performance.
Repairing a Leaking Brake Master Cylinder
Gathering necessary tools and equipment
Before diving into the repair process, it’s essential to gather all the necessary tools and equipment. You will need a few items to successfully repair a leaking brake master cylinder. First and foremost, make sure you have the correct type of brake fluid for your vehicle. Additionally, you’ll need wrenches and sockets to remove and reinstall the master cylinder. A brake line wrench is also crucial to avoid damaging the brake lines during the process. Finally, ensure you have a replacement brake master cylinder ready for installation.
Preparing the work area
To make the repair process more manageable, it’s important to prepare the work area. First and foremost, ensure your safety by wearing appropriate protective gear, such as gloves and safety glasses. If you will be working underneath the vehicle, it’s vital to lift and secure it properly using jack stands or ramps. Additionally, gather proper lighting to ensure you can see the components clearly and work with precision.
Removing the brake master cylinder
To repair a leaking brake master cylinder, you’ll need to start by removing the old cylinder. Begin by disconnecting the brake lines from the master cylinder using a wrench or brake line wrench. Carefully loosen the fittings and be prepared for some brake fluid leakage. Once the brake lines are detached, use appropriate sockets or wrenches to unbolt the master cylinder from its mounting location. Carefully remove the old cylinder, ensuring not to damage any surrounding components or brake lines in the process.
Inspecting and cleaning the cylinder
With the old brake master cylinder removed, it’s essential to thoroughly inspect and clean the cylinder before proceeding with the repair. Inspect the cylinder for any signs of damage, such as cracks or excessive wear. Additionally, check the internal components, including the piston and seals, for any signs of wear or deterioration. If any components are faulty, they will need to be replaced. Use a clean cloth and brake cleaner to carefully clean the cylinder and remove any dirt or debris that may be present.
Replacing the faulty components
If you identified any faulty components during the inspection, it’s crucial to replace them before proceeding with the repair. Replace any damaged or worn-out seals, pistons, or other internal components with new ones. Follow the manufacturer’s instructions or consult a repair manual to ensure proper installation. Using quality replacement parts is essential to ensure the longevity and effectiveness of the repaired brake master cylinder.
Reassembling the brake master cylinder
Once you have replaced any faulty components, you can proceed with reassembling the brake master cylinder. Carefully position the new cylinder in its mounting location and secure it with the appropriate bolts or nuts. Ensure the cylinder is properly aligned and tightened to the manufacturer’s specifications. Additionally, reconnect the brake lines to the cylinder, ensuring that the fittings are tight and secure. Proper assembly is essential to ensure the brake system functions correctly and safely.
Bleeding the brake system
After reassembling the brake master cylinder, it’s crucial to bleed the brake system to remove any air trapped in the lines. Bleeding the brakes involves removing air bubbles from the brake lines to ensure proper brake pedal feel and performance. Follow the manufacturer’s instructions or consult a repair manual for the correct bleeding procedure for your specific vehicle. It typically involves opening the bleeder valves on each brake caliper or wheel cylinder and allowing the brake fluid to flow until all air bubbles are eliminated.
Testing the repaired brake master cylinder
Once the bleeding process is complete, it’s time to test the repaired brake master cylinder. Start the engine and press the brake pedal multiple times, ensuring it feels firm and responsive. The brake pedal should not sink to the floor or feel spongy. Additionally, test the vehicle’s braking performance by taking it on a short test drive, paying close attention to how the brakes feel and respond. If everything feels normal and the brakes are working effectively, you have successfully repaired the leaking brake master cylinder.


