So, you’re all ready to hit the road and start your day, but there’s just one problem – your car won’t start. Frustrating, isn’t it? Don’t worry, though, because we’ve got your back. In this article, we’ll walk you through some simple and practical steps to troubleshoot why your car won’t start. From checking the battery and connections to inspecting the ignition switch and fuel system, we’ve got all the tips and tricks you need to get your car up and running again. So, let’s get started and get you back on the road in no time!
Checking the Battery
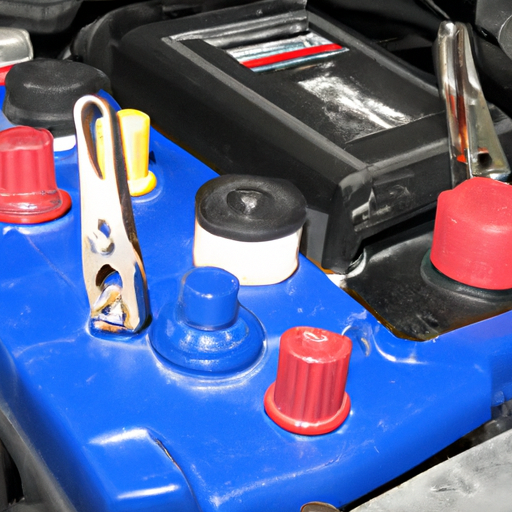
When troubleshooting a car that won’t start, it is crucial to start by checking the battery. The battery is the heart of the electrical system in your car and provides the necessary power to start the engine. There are two main aspects to consider when inspecting the battery: testing the battery voltage and inspecting the battery terminals.
Testing the battery voltage
To test the battery voltage, you will need a multimeter. Start by turning off all electrical components in your car, such as lights, radio, and air conditioning. Then, set your multimeter to the DC voltage setting. Connect the positive (red) probe to the positive terminal of the battery and the negative (black) probe to the negative terminal. The multimeter should display a voltage between 12.4 to 12.6 volts for a fully charged battery. If the voltage reading is significantly lower, it may indicate that the battery is weak or discharged and needs to be recharged or replaced.
Inspecting the battery terminals
Inspecting the battery terminals is another essential step in troubleshooting a car that won’t start. Over time, the battery terminals can become dirty or corroded, leading to poor electrical connection and preventing the car from starting. Start by visually examining the battery terminals for any signs of corrosion or buildup. If you notice corrosion, you can use a mixture of baking soda and water and a wire brush to clean the terminals. Make sure to disconnect the battery cables before cleaning and reconnect them securely after cleaning to ensure a proper connection.
Examining the Ignition Switch
The ignition switch plays a crucial role in starting your car’s engine. If there is an issue with the ignition switch, it can prevent the car from starting. To troubleshoot the ignition switch, you should check the key and inspect the ignition switch itself.
Checking the key
Sometimes, a faulty or worn-out key can cause problems with the ignition switch. Examine your car key for any signs of damage or excessive wear. If you notice any issues, such as a bent or damaged key, it is advisable to get a new key made by a professional locksmith or your car dealership. Using a new key may solve the issue and allow your car to start.
Inspecting the ignition switch
If the key appears to be in good condition, you should inspect the ignition switch itself. The ignition switch is typically located on the steering column or dashboard near the key cylinder. Check for any loose connections or damaged wiring around the ignition switch. If you notice any abnormalities, it is best to consult a professional mechanic who can further diagnose the issue and perform any necessary repairs.
Verifying the Starter Motor
Another component to inspect when troubleshooting a car that won’t start is the starter motor. The starter motor is responsible for cranking the engine and initiating the combustion process. There are two main aspects to consider when verifying the starter motor: listening for clicking sounds and inspecting the starter motor connections.
Listening for clicking sounds
When you turn the ignition key, listen for any clicking sounds coming from the engine compartment. If you hear a rapid clicking noise, it could indicate a problem with the starter motor. The clicking sound usually signifies that the starter motor is receiving power but failing to engage with the engine. In this case, it is advisable to seek the assistance of a professional mechanic who can properly diagnose and repair the starter motor.
Inspecting the starter motor connections
Inspecting the connections of the starter motor is also essential. Over time, the electrical connections to the starter motor can loosen or become corroded, resulting in a poor electrical connection. Start by locating the starter motor, usually mounted on the engine block near the transmission. Check the connections at the starter motor for any signs of corrosion or looseness. If you notice any issues, clean the connections thoroughly and tighten them securely. If the connections appear to be in good condition, yet the car still won’t start, it may be necessary to have the starter motor tested by a professional to determine if it needs to be repaired or replaced.
Inspecting the Fuel System
The fuel system plays a vital role in delivering fuel to the engine for combustion. If there is an issue with the fuel system, it can prevent the engine from starting. When troubleshooting a car that won’t start, it is crucial to inspect the fuel gauge, fuel pump, and fuel filter.
Checking the fuel gauge
Start by checking the fuel gauge on your dashboard. Ensure that you have an adequate amount of fuel in the tank. It may seem obvious, but sometimes a low fuel level can cause the engine to sputter or not start at all. If the fuel gauge indicates a low fuel level, it is advisable to add more fuel and attempt to start the car again.
Inspecting the fuel pump
The fuel pump is responsible for pumping fuel from the gas tank to the engine. A malfunctioning fuel pump can prevent the engine from receiving the necessary fuel for combustion. To inspect the fuel pump, listen for a humming sound after turning the ignition key to the “ON” position without starting the engine. The humming sound indicates that the fuel pump is functioning correctly. If you don’t hear any sound or notice a lack of fuel pressure, it may indicate a problem with the fuel pump that requires further inspection and possible replacement by a professional mechanic.
Examining the fuel filter
The fuel filter is designed to capture any impurities or debris in the fuel before it reaches the engine. Over time, the fuel filter can become clogged, restricting the flow of fuel. A clogged fuel filter can prevent the engine from starting or cause it to run poorly. To examine the fuel filter, locate it along the fuel line, usually near the gas tank or engine bay. If the fuel filter appears dirty or clogged, it is advisable to replace it to ensure proper fuel flow to the engine. Regularly replacing the fuel filter as part of your car’s maintenance routine can help prevent starting issues and maintain optimal engine performance.
Analyzing the Ignition System
The ignition system is responsible for creating the spark necessary to ignite the fuel-air mixture in the engine cylinders. If there is an issue with the ignition system, it can cause the engine to misfire or not start at all. When troubleshooting a car that won’t start, it is essential to check the spark plugs, ignition coil, and distributor cap and rotor.
Checking the spark plugs
Spark plugs play a crucial role in the ignition process by creating the spark that ignites the fuel-air mixture. Over time, spark plugs can become fouled, worn, or damaged, resulting in a weak or non-existent spark. Inspect the spark plugs by removing them one by one using a spark plug socket. Check for any signs of fouling, such as black carbon deposits or oil residue. If the spark plugs appear dirty or damaged, it is advisable to replace them with new ones that are compatible with your car’s make and model.
Testing the ignition coil
The ignition coil transforms the low voltage from the battery into the high voltage needed to create a spark at the spark plugs. A faulty ignition coil can cause a weak or no spark, preventing the engine from starting. To test the ignition coil, you will need an ignition coil tester or a digital multimeter. Follow the manufacturer’s instructions to perform the test and compare the results to the specified values for your car’s ignition coil. If the ignition coil fails the test, it is recommended to replace it with a new one.
Examining the distributor cap and rotor
The distributor cap and rotor play a crucial role in distributing the spark from the ignition coil to the correct spark plug. Over time, the distributor cap and rotor can become worn or cracked, affecting the spark distribution. Inspect the distributor cap and rotor for any signs of damage, such as cracks or excessive wear. If you notice any issues, it is advisable to replace them with new ones to ensure proper spark distribution and improve the chances of your car starting successfully.
Examining the Alternator
The alternator is responsible for charging the battery while the engine is running and providing electrical power to the car’s electrical components. A malfunctioning alternator can cause the battery to drain, resulting in a car that won’t start. When troubleshooting a car that won’t start, it is crucial to inspect the alternator belts and test the alternator output.
Inspecting the alternator belts
The alternator is driven by a belt connected to the engine’s crankshaft. Over time, the alternator belts can become worn or loose, affecting the charging system’s performance. Inspect the condition and tension of the alternator belts. If you notice any signs of wear or looseness, it is advisable to replace the belts to ensure proper operation of the alternator.
Testing the alternator output
To test the alternator output, you will need a multimeter. Start by turning off all electrical components in your car. Set your multimeter to the DC voltage setting and connect the positive (red) probe to the positive terminal of the battery and the negative (black) probe to the negative terminal. With the engine running, the multimeter should display a voltage between 13.8 to 14.4 volts, indicating that the alternator is charging the battery properly. If the voltage reading is significantly lower or higher, it may indicate a problem with the alternator that requires further inspection and possible replacement.
Assessing the Engine Control Unit (ECU)
The Engine Control Unit (ECU) is the computer that manages and controls various engine functions, such as fuel injection, ignition timing, and emissions control. If there is an issue with the ECU, it can affect the starting process of the car. When troubleshooting a car that won’t start, it is crucial to check for error codes and inspect the ECU connections.
Checking for error codes
To check for error codes, you will need an OBD-II scanner, which is a device that can retrieve diagnostic trouble codes from the ECU. Locate the OBD-II port, usually beneath the dashboard on the driver’s side. Plug in the OBD-II scanner and follow the manufacturer’s instructions to retrieve any error codes. Error codes can provide valuable information about the specific issue affecting your car’s starting system. If you are unsure about the meaning of the error codes, it is advisable to consult the vehicle’s service manual or seek the assistance of a professional mechanic.
Inspecting the ECU connections
The ECU relies on a series of electrical connections to communicate and control various engine functions. Over time, these connections can become loose or corroded, leading to communication issues and starting problems. Inspect the connections to the ECU for any signs of corrosion or looseness. If you notice any abnormalities, clean the connections thoroughly and ensure a secure connection. If the connections appear to be in good condition, yet the car still won’t start, it may be necessary to have the ECU inspected and professionally diagnosed for any potential faults.
Inspection of the Starter Solenoid
The starter solenoid is a small electromagnet that is responsible for engaging the starter motor when the ignition key is turned. If there is an issue with the starter solenoid, it can prevent the starter motor from engaging, resulting in a car that won’t start. When troubleshooting a car that won’t start, it is essential to test the solenoid’s voltage and check for solenoid engagement.
Testing the solenoid’s voltage
To test the solenoid’s voltage, you will need a multimeter. Set your multimeter to the DC voltage setting. Connect the positive (red) probe to the positive terminal of the battery and the negative (black) probe to the solenoid’s signal wire. With the ignition key in the “START” position, the multimeter should display a voltage between 10.5 to 12 volts, indicating that the solenoid is receiving the proper voltage signal. If there is no voltage or a significantly lower voltage reading, it may indicate a problem with the solenoid or its associated wiring that requires further inspection and possible replacement.
Checking for solenoid engagement
When you turn the ignition key to the “START” position, observe the starter motor and listen for any clicking or grinding sounds. If the starter motor doesn’t engage or you hear unusual noises, it may indicate a problem with the solenoid’s engagement mechanism. In this case, it is advisable to seek the assistance of a professional mechanic who can properly diagnose and repair the starter solenoid or the associated components.
Checking the Fuel Pump Relay
The fuel pump relay is responsible for controlling the power supply to the fuel pump. If there is an issue with the fuel pump relay, it can prevent the fuel pump from receiving power, leading to a car that won’t start. When troubleshooting a car that won’t start, it is crucial to inspect the relay’s connections and test the relay’s functionality.
Inspecting the relay’s connections
The fuel pump relay is typically located in the engine bay fuse box or a separate relay box. Start by locating the fuel pump relay and visually inspect its connections. Check for any signs of corrosion or looseness. If you notice any abnormalities, clean the connections thoroughly and ensure a secure connection. Poor connections can cause the relay to malfunction and prevent the fuel pump from receiving power.
Testing the relay’s functionality
To test the fuel pump relay’s functionality, you will need a multimeter or a relay tester. Follow the manufacturer’s instructions to perform the test and compare the results to the specified values for your car’s fuel pump relay. If the fuel pump relay fails the test or shows inconsistent readings, it may indicate a faulty relay that needs to be replaced. Consult the vehicle’s service manual or seek the assistance of a professional mechanic to properly diagnose and replace the fuel pump relay if necessary.
Verifying the Engine Compression
Engine compression refers to the pressure created within the engine cylinders during the combustion process. If there is an issue with engine compression, it can prevent the car from starting or cause it to run poorly. When troubleshooting a car that won’t start, it is crucial to perform a compression test and check for engine leaks.
Performing a compression test
To perform a compression test, you will need a compression tester. Start by removing all the spark plugs from the engine. Connect the compression tester to the first spark plug hole and crank the engine using the starter motor for a few seconds. Note the pressure reading on the compression tester gauge and repeat the process for each cylinder. Compare the pressure readings to the specifications provided in your vehicle’s service manual. Significant variations in pressure between cylinders or low overall compression can indicate potential engine problems, such as worn piston rings or a blown head gasket, that requires further inspection and possible repair.
Checking for engine leaks
Engine leaks can also contribute to starting issues. Visually inspect the engine for any signs of oil or coolant leaks. Common areas to check for leaks include the valve covers, head gasket, oil pan gasket, and coolant hoses. If you notice any leaks, it is advisable to address them promptly to prevent further damage to the engine and ensure proper starting and running of your car.
By following these troubleshooting steps and thoroughly inspecting each component of your car’s starting system, you should be able to identify and resolve the issue causing your car not to start. However, if you are unable to diagnose or resolve the problem on your own, it is always recommended to seek the assistance of a professional mechanic who has the expertise and tools to effectively troubleshoot and repair your car. Remember, proper maintenance and regular inspections can help prevent starting issues and ensure the overall performance and reliability of your vehicle.


