In this article, we’ll explore the ins and outs of troubleshooting and fixing problems with a car’s exhaust manifold gasket. Whether you’ve noticed strange noises coming from your engine or experienced decreased performance, understanding the signs and taking prompt action can save you from potential headaches down the road. So, fasten your seatbelt and get ready to learn all about diagnosing and resolving issues with your car’s exhaust manifold gasket!
Troubleshooting a Car’s Exhaust Manifold Gasket
Identifying Symptoms of a Faulty Gasket
When your car’s exhaust manifold gasket is faulty, there are several symptoms you may notice. One common sign is a loud ticking or hissing noise coming from the engine compartment. This noise is often more noticeable during acceleration or idle. Another symptom to watch out for is a decrease in engine performance, which may include reduced power or acceleration. You may also experience an increase in fuel consumption or a strong smell of exhaust fumes. Lastly, if you notice white smoke coming from the exhaust pipe, it could be an indication of a damaged gasket.
Inspecting the Gasket for Damage
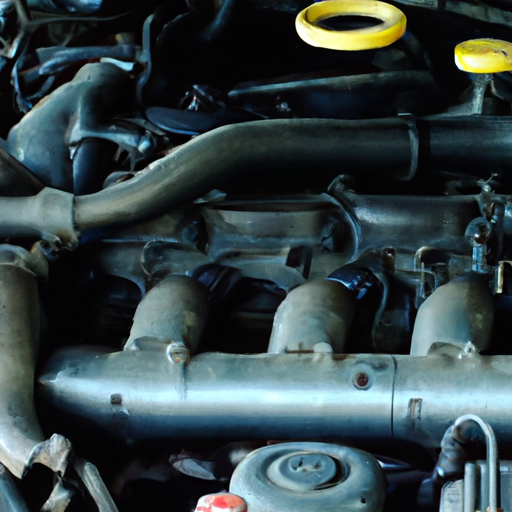
To troubleshoot a faulty exhaust manifold gasket, it is essential to visually inspect the gasket for any signs of damage. Start by allowing your car’s engine to cool down completely before beginning the inspection process. Once the engine is cool, open the hood and locate the exhaust manifold, which is typically attached to the engine block. Carefully inspect the gasket for any visual signs of wear, such as cracks, breaks, or areas where it may be leaking. Additionally, check for any black soot around the gasket, as this may indicate a leak.
Performing a Compression Test
If you suspect a faulty exhaust manifold gasket, performing a compression test is a reliable method to confirm the issue. Begin by removing the spark plugs from all cylinders and disconnecting the fuel injectors. Next, connect a compression tester to each cylinder and crank the engine for a few seconds, noting the readings for each cylinder. The compression test results should be relatively consistent across all cylinders. If you observe a significant drop in compression in one particular cylinder, it could indicate a leak caused by a damaged gasket.
Using Smoke Test to Locate Leaks
To locate potential leaks in the exhaust manifold gasket, a smoke test can be a useful troubleshooting method. This test involves introducing smoke into the intake manifold while the engine is not running. The smoke will then escape through any leaks, making them visible and easier to identify. It is crucial to follow the manufacturer’s instructions for the smoke tester or consult a professional mechanic to ensure a safe and accurate test. By locating the leaks with a smoke test, you can determine if the gasket is indeed faulty and in need of replacement.
Checking for Exhaust Leakage Noise
Another way to troubleshoot a faulty exhaust manifold gasket is by listening for exhaust leakage noise. Start the car’s engine and pay close attention for any abnormal noises coming from the exhaust system. When the gasket is damaged, you may hear a distinct hissing, popping, or ticking sound, especially during acceleration or at idle. If you hear these noises, it could suggest that the gasket is not sealing properly and may require replacement.
Performing a Visual Inspection
Alongside the other troubleshooting methods, performing a comprehensive visual inspection of the exhaust manifold and associated components is crucial. Carefully examine the manifold’s surface for any cracks, warping, or other forms of damage. Check the mounting bolts for tightness and ensure they are not stripped or corroded. Additionally, inspect the surrounding exhaust system components, such as the catalytic converter, pipes, and muffler, for any signs of damage or leaks. A thorough visual inspection will help you identify any issues that might contribute to the faulty gasket and ensure all necessary repairs are made.
Fixing Problems with a Car’s Exhaust Manifold Gasket
Gasket Replacement Process
If you have determined that your car’s exhaust manifold gasket is faulty and needs replacement, it is essential to follow a proper procedure to fix the issue. Begin by gathering all the necessary tools and materials required for the replacement process. It is also advisable to have a service manual specific to your car model for reference. Ensure you have a well-ventilated workspace and allow your engine to cool down before starting any work.
Removing the Exhaust Manifold
To access and replace the faulty gasket, you will first need to remove the exhaust manifold. Start by disconnecting the negative terminal of the car battery to prevent any electrical mishaps. Next, disconnect any electrical connectors, sensors, or hoses attached to the manifold. Once all the connections are detached, carefully unbolt the manifold from the engine block, ensuring you keep track of all the bolts for reassembly later. Gently remove the manifold, being cautious not to damage any surrounding components.
Cleaning and Preparing the Surfaces
Before installing the new gasket, it is essential to thoroughly clean and prepare the surfaces to ensure proper sealing. Begin by removing any remaining gasket material from both the engine block and the manifold using a gasket scraper or a plastic scraper. Be careful not to scratch or damage the surfaces while removing the old gasket. Once all the old gasket material is removed, use a clean cloth or rag to wipe away any residue or debris. Ensure both surfaces are clean, dry, and free from any oil or grease before proceeding.
Installing the New Gasket
Once the surfaces are clean and dry, it is time to install the new exhaust manifold gasket. Carefully position the gasket on the engine block, ensuring that all bolt holes line up correctly. Take caution not to bend or damage the gasket during installation. Once in place, double-check that the gasket is aligned correctly and evenly seated on the engine block. This step is crucial to ensure a proper seal and prevent any leaks in the future.
Tightening the Manifold Bolts
With the new gasket in place, it is time to reattach the exhaust manifold. Begin by aligning the manifold with the gasket and carefully insert all the bolts into their respective holes. Make sure each bolt is tightened gradually and evenly to ensure a proper and secure fit. Take extra care not to overtighten the bolts, as this may result in damage to the gasket or the manifold. Refer to your car’s service manual or manufacturer’s specifications for the recommended torque values for the manifold bolts.
Reassembling the Exhaust System
After tightening the manifold bolts, it is essential to reassemble the exhaust system components that were disconnected during the gasket replacement process. Reconnect any electrical connectors, sensors, or hoses that were detached initially. Ensure all connections are secure and properly tightened. Once everything is reconnected, double-check all the work to ensure nothing was missed or left loose. Finally, reconnect the car battery’s negative terminal and start the engine to test for any leaks or abnormal noises. If everything sounds and performs as expected, you have successfully fixed the problems with your car’s exhaust manifold gasket.
By following these troubleshooting and fixing procedures, you can effectively diagnose and resolve any issues with your car’s exhaust manifold gasket. Remember to exercise caution and escalate to a professional mechanic if you encounter any difficulties or uncertainties during the troubleshooting or replacement process. Taking prompt action to resolve a faulty gasket will not only ensure your car’s optimal performance but also contribute to a safer and more efficient driving experience.


