Have you ever wondered what to do when your car’s exhaust back pressure sensor starts acting up? Well, look no further! In this article, we will discuss the step-by-step process to diagnose and repair a malfunctioning exhaust back pressure sensor in a friendly and easy-to-understand manner. Whether you’re a seasoned car enthusiast or a novice DIY-er, we’ve got you covered. So, let’s roll up our sleeves and get ready to tackle this issue head-on!
Inspecting the Exhaust Back Pressure Sensor
Visual Inspection
The first step in diagnosing and repairing a malfunctioning car’s exhaust back pressure sensor is to visually inspect the sensor. Begin by locating the sensor, which is typically found on the exhaust system, near the manifold. Check for any visible signs of damage, such as corrosion, leaks, or loose connections. Additionally, inspect the wiring harness connected to the sensor and ensure that it is intact and properly secured. This visual inspection will help determine if any physical issues are present that may be causing the malfunction.
Testing with a Multimeter
After conducting a visual inspection, the next step is to test the exhaust back pressure sensor using a multimeter. To do this, start by disconnecting the wiring harness from the sensor. Set the multimeter to the resistance (ohms) setting and touch the probes to the sensor’s terminals. The multimeter should display a resistance reading within the specified range according to the manufacturer’s specifications. If the reading is outside the acceptable range or displays an open circuit, it indicates a faulty sensor. However, if the reading falls within the specified range, further diagnostic steps are required to determine the cause of the malfunction.
Diagnosing the Malfunctioning Sensor
Checking for Fault Codes
If the visual inspection and multimeter test do not identify any issues with the exhaust back pressure sensor, the next step is to check for fault codes using a diagnostic tool or scanner. Connect the scanner to the car’s OBD-II port, usually located beneath the steering wheel. Access the vehicle’s onboard computer system and retrieve the fault codes. These codes will provide information about any specific sensor malfunctions or system issues that may be affecting the performance of the exhaust back pressure sensor. Analyzing the fault codes will help pinpoint the underlying problem and guide further troubleshooting steps.
Performing Pressure Test
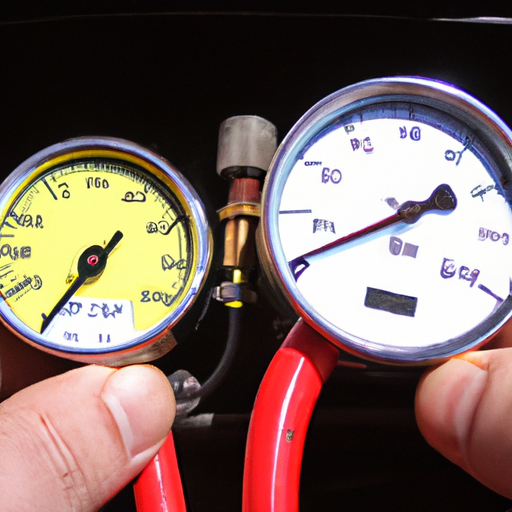
In addition to checking for fault codes, performing a pressure test on the exhaust system can also assist in diagnosing a malfunctioning sensor. Begin by connecting a pressure gauge to the exhaust system, typically at the point where the sensor is located. Start the engine and observe the pressure readings on the gauge while the vehicle is running. Compare the readings to the manufacturer’s specifications to determine if the exhaust back pressure is within the acceptable range. If the pressure is too high or too low, it can indicate a problem with the sensor or other components of the exhaust system. These results can further guide the diagnosis and subsequent repair process.
Removing the Faulty Sensor
Gathering the Required Tools
To remove the malfunctioning exhaust back pressure sensor, gather the necessary tools beforehand. This typically includes a socket wrench or adjustable wrench, pliers, and a wire cutter/stripper. It is crucial to have the right tools on hand to ensure a smooth and efficient removal process.
Locating the Sensor
Identifying the exact location of the exhaust back pressure sensor is essential before attempting its removal. Consult the vehicle’s repair manual or manufacturer’s documentation to locate the sensor accurately. It is usually positioned somewhere along the exhaust system, near the manifold. Take note of any nearby components or obstructions that may need to be temporarily removed or maneuvered to access the sensor easily.
Disconnecting the Sensor
Once the sensor’s location is determined, proceed by disconnecting it from the exhaust system. Carefully detach any wiring connected to the sensor by disconnecting the wiring harness using pliers or a suitable tool. Take note of how the wiring is routed or secured to ensure the proper reinstallation of the new sensor later. Once the wiring is disconnected, use a socket wrench or an adjustable wrench to loosen and remove the sensor from its mounting point on the exhaust system. Gently maneuver the sensor out, being cautious of any seals or gaskets that may require replacement.
Installing a New Sensor
Choosing the Correct Replacement
Before installing a new exhaust back pressure sensor, it is vital to choose the correct replacement part. Consult the vehicle’s repair manual or manufacturer’s documentation for the specific sensor model required. It is essential to ensure compatibility with the make, model, and year of the vehicle to guarantee a proper fit and functionality.
Preparing the New Sensor
Before installing the new sensor, inspect it for any defects or damage. Ensure that the sensor is clean and free of debris. If necessary, use a rag or compressed air to remove any dirt or contaminants. Check the sensor’s electrical connectors for any signs of corrosion or damage. If corrosion is present, clean the connectors using an electrical contact cleaner or a suitable solution.
Mounting the Sensor
Carefully position the new exhaust back pressure sensor in the mounting point on the exhaust system. Ensure that any seals or gaskets are properly aligned and in good condition. Use a socket wrench or adjustable wrench to tighten the sensor securely, but avoid overtightening, as it may damage the sensor or the mounting point. Once the sensor is securely fastened, reconnect the wiring harness and ensure a snug connection. Take care to route and secure the wiring properly to prevent any future issues.
Clearing Fault Codes
Using an OBD-II Scanner
After installing the new exhaust back pressure sensor, it is important to clear any fault codes stored in the vehicle’s onboard computer system. This can be done using an OBD-II scanner. Connect the scanner to the car’s OBD-II port and access the system to clear any existing fault codes related to the previous sensor malfunction. Clearing the fault codes will reset the system and allow for a fresh start to ensure accurate monitoring and detection of any future issues.
Resetting the Check Engine Light
In addition to clearing fault codes, resetting the check engine light is necessary after replacing the malfunctioning exhaust back pressure sensor. Once all fault codes are cleared, start the vehicle’s engine and check for the presence of the check engine light. If the light remains illuminated, use the scanner or diagnostic tool to reset the check engine light. This step ensures that the vehicle’s monitoring system recognizes the replacement of the faulty sensor and operates correctly without any false indications.
Testing the Repair
Starting the Engine
After completing the sensor replacement, start the vehicle’s engine and confirm that it starts smoothly without any issues. Listen for any abnormal noises coming from the exhaust system, such as hissing or rattling sounds, which could indicate a potential problem.
Monitoring Sensor Readings
Once the engine is running, it is crucial to monitor the readings from the new exhaust back pressure sensor. Use a diagnostic tool or scanner to access the sensor data and observe the readings while the vehicle is in operation. The readings should fall within the acceptable range specified by the manufacturer. If the readings are outside the expected range or exhibit erratic behavior, it may indicate a continuing issue with the sensor or another component of the exhaust system. In such cases, further diagnostics or adjustments may be necessary.
Additional Considerations
Inspecting the Exhaust System
While diagnosing and repairing a malfunctioning exhaust back pressure sensor, it is essential to inspect the entire exhaust system for any other potential issues. Check for any visible signs of damage, leaks, or corrosion on the exhaust pipes, muffler, or catalytic converter. Inspecting the entire system ensures that all components are functioning properly and reduces the risk of future malfunctions or failures.
Checking for Other Faulty Components
In some cases, a malfunctioning exhaust back pressure sensor may be a symptom of other faulty components within the vehicle’s engine or emission control system. Therefore, it is advisable to check for other potential issues or malfunctions that may have contributed to the sensor’s malfunction. Running additional diagnostic tests on related components, such as oxygen sensors or the EGR valve, can help identify and address any underlying problems.
Seeking Professional Help
Consulting an Automotive Technician
If the diagnosis and repair steps described above are beyond your level of expertise or do not resolve the sensor malfunction, it is recommended to seek professional help. Consulting an automotive technician with experience in diagnosing and repairing exhaust system issues can provide valuable insights and solutions. The technician can use specialized equipment and advanced diagnostic tools to pinpoint the exact cause of the sensor malfunction and perform the necessary repairs.
Getting a Second Opinion
In complex cases or situations where multiple repair options are presented, seeking a second opinion from another automotive technician is a wise decision. Another professional’s perspective can validate the initial diagnosis or offer alternative solutions that may better suit your budget or preferences. A second opinion can provide peace of mind and ensure that the necessary repairs are carried out effectively and efficiently.
Regular Maintenance
Periodic Inspection
To prevent future issues with the exhaust back pressure sensor, it is important to include it in your regular vehicle maintenance routine. Conduct periodic inspections of the sensor, wiring harness, and surrounding components for any signs of damage or wear. Look for corrosion, leaks, or loose connections. This proactive approach allows early detection of any potential problems and enables timely repairs or replacements.
Cleaning or Replacing Sensor
During regular maintenance, consider cleaning or replacing the exhaust back pressure sensor as needed. Over time, the sensor may become contaminated with dirt, soot, or carbon deposits, impairing its functionality. Use a suitable cleaning solution and a soft brush to gently remove any build-up. If cleaning does not restore proper operation, replacing the sensor may be necessary. Follow the same steps outlined in the “Removing the Faulty Sensor” and “Installing a New Sensor” sections to ensure a successful replacement.
Preventing Sensor Damage
Avoiding Rough Terrain
To prevent damage to the exhaust back pressure sensor, exercise caution when driving over rough terrain. Rough roads, potholes, or debris can cause impact or vibration that may dislodge or damage the sensor. Be mindful of your driving environment and take appropriate measures to navigate rough terrain without subjecting the sensor to unnecessary stress or shock.
Maintaining Optimal Engine Performance
Maintaining optimal engine performance is crucial to prevent stress or strain on the exhaust back pressure sensor. Regularly service the vehicle’s engine, including oil changes, air filter replacements, and spark plug inspections, to ensure smooth and efficient operation. A well-maintained engine reduces the risk of excessive pressure or temperature fluctuations in the exhaust system, which can impact the sensor’s performance.
By following these steps to diagnose and repair a malfunctioning car’s exhaust back pressure sensor, you can address the issue effectively and ensure the proper functioning of your vehicle’s exhaust system. Regular maintenance and preventative measures will help prolong the lifespan of the sensor and reduce the likelihood of future malfunctions. If you ever encounter difficulties or are unsure about any part of the process, consulting an automotive technician or seeking a second opinion is always advisable. With proper care and attention, your vehicle’s exhaust system will continue to perform optimally, providing you with a smooth and reliable driving experience.


